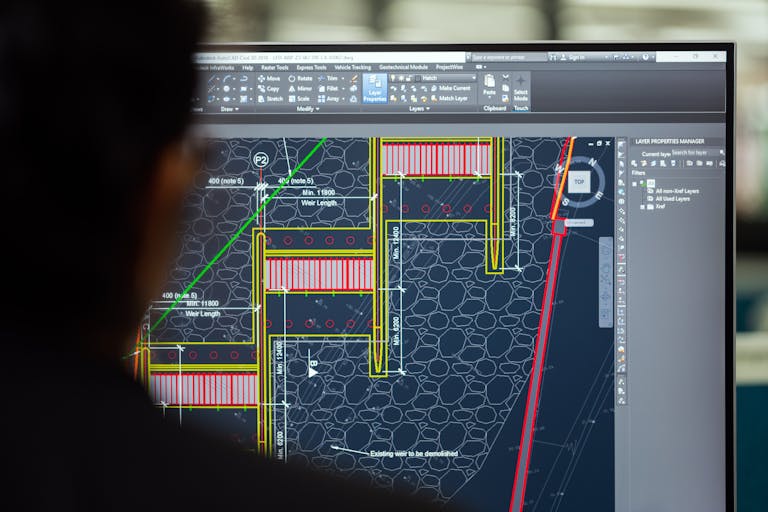
AutoCAD Block, Dynamic Block and Count for Efficient Design Creation

Understanding AutoCAD Blocks: The Foundation of Efficient Design
What are Blocks in AutoCAD?
A block is a group of drawing elements in AutoCAD that are combined into a single entity. Blocks are reusable, meaning you can create one and insert it multiple times. This feature greatly enhances efficiency and promotes better organization.
What are the benefits of Blocks in AutoCAD?
There are several benefits of using blocks in AutoCAD. Some of the major benefits are mentioned below:
- Time Saver – You can save a lot of time by simply inserting a block than creating again
- No Errors – Since each block is defined by the block definition, no errors will be generated if the same block is used again and again. In case you decide to draw an object multiple times instead of using it as a block, there is room to error.
- Global Update – You only need to update the block once for it to update everywhere in the drawing.
- Reduced File Size – Using a door block 11 times will occupy significantly less space compared to creating it with two-dimensional drawing elements each time. Here’s why: AutoCAD stores the detailed block definition just once when you use a block, and each new insertion only takes up a fraction of the space. In contrast, if you draw the same object multiple times, AutoCAD will store the definition of each drawn instance, resulting in much higher storage requirements.
- Organization – Using blocks will keep your drawing more organized as you will have a count of these blocks and be able to update the block and its properties globally.
What are the different types of Blocks?
There are three major types of blocks in AutoCAD – Internal Blocks, WBlocks or Write Blocks, and Nested Blocks.
Internal Blocks are created and stored within the currently used CAD file. Although Internal Blocks cannot be accessed directly from other files, you can manually copy and paste a block from one drawing to another. When you do this, the CAD file where the block is pasted will generate a new definition for that block.
WBlocks, also referred to as Write Blocks, are saved as individual files that can be accessed by multiple projects through the Block Library. They are particularly useful for maintaining standard details for your venture, allowing you to reuse them across various projects.
In AutoCAD, when a block uses another block within its definition, it is referred to as a nested block. This creates a hierarchy among the blocks. While nesting blocks can help organize them effectively, it can also make it challenging to adjust plot styles or layer properties. Personally, I faced difficulties when trying to modify a building block provided by an architect to ensure that all blocks would plot correctly.
There are also dynamic blocks about which you will learn below.
How to Create Blocks in AutoCAD?
The procedures to create internal blocks and WBlocks are different. Let’s take a look at the procedure for creating both of them.
Below are steps to create a block (internal) in AutoCAD:
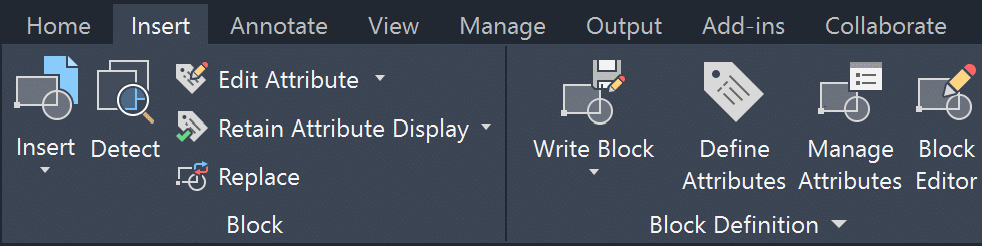
Step 1: Activate the Block command by typing BLOCK in the command line or clicking Create Block button in the Insert Tab (Insert > Block Definition > Create Block). The Block Definition dialog box is displayed.
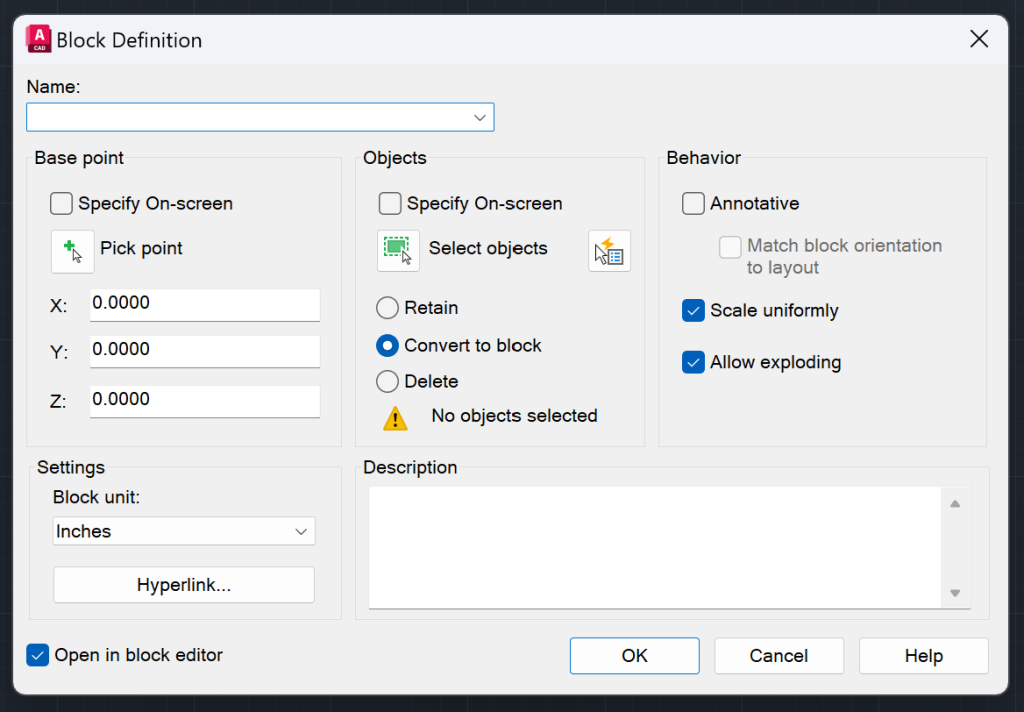
Step 2: Type in a name for the block.
Step 3: Specify the Base Point for the block. This base point will be the insertion point for the block in the future, and during insertion, you can rotate the object at that point. I recommend putting the base point in the center or in one of the corners.
Step 4: Choose the units for the block. You can choose from 21 units or choose unitless.
Step 5: Select the object that you want to convert into a block. Choose from Retain, Convert to Block or Delete option. Learn about each option below:
- Retain: The selected object stays as an object after you add it to Block Definition
- Convert to Block: The selected object becomes a block after you add it to Block Definition
- Delete: The selected object is deleted after you add it to Block Definition
Step 6: Next, choose the Block Behavior. You can choose Annotative, Scale Uniformly, and Allow Exploding.
Step 7: Add a description for the block if you want.
Checkout the GIF below to see creating an AutoCAD Block in action.
Below are steps to create WBlock in AutoCAD:
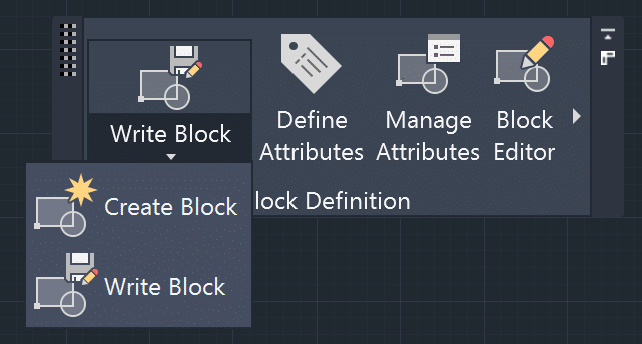
Step 1: Activate the WBlock command by typing WBLOCK in the command line or clicking Write Block button in the Insert Tab (Insert > Block Definition > Write Block). The Write Block Definition dialog box is displayed.
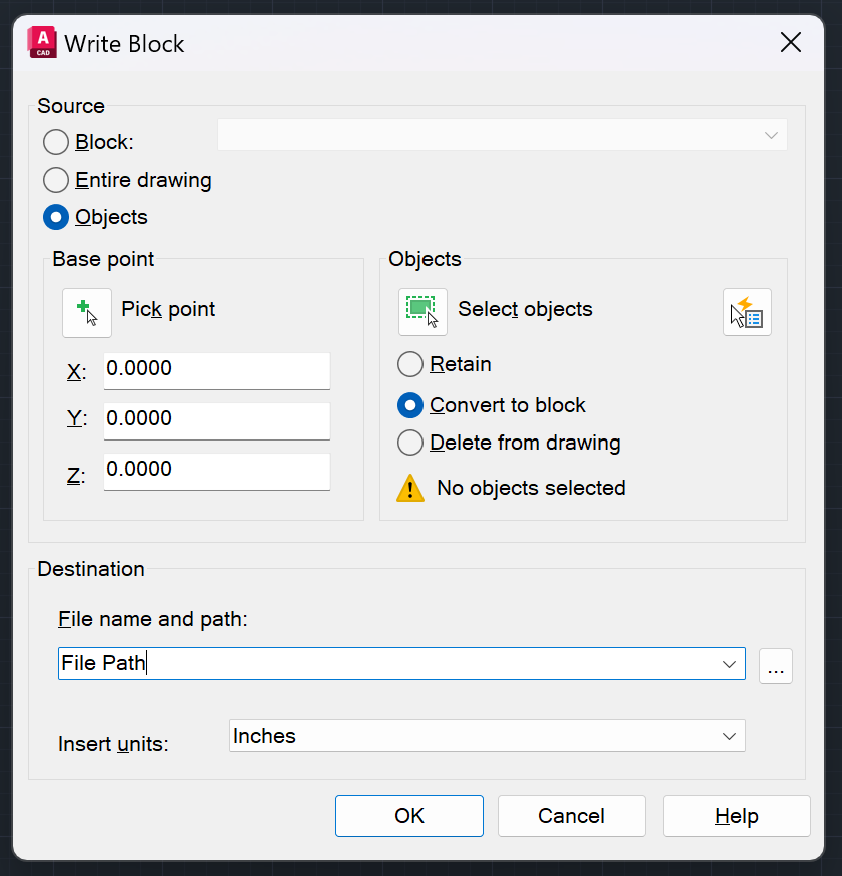
Step 2: First choose the source for the WBlock. If you have already created the block, choose the block option and choose the block that you want to make into a WBlock. If you want to make the whole drawing into a WBlock, you can choose the Entire Drawing Option. When you select these two options, you can simply hit ok and the WBlock will be successfully created.
If you want to make an object into WBlock, select the Object Option. This will give you more follow-up options.
Step 3: Select the base point, which will essentially be the insertion point.
Step 4: Select the object you want to convert into a block. Choose what happens to the selected object – Retain, Convert to Block or Delete from Drawing.
Step 5: Select where you want the file to be saved.
Step 6: Select the insertion units and then hit ok.
Both Internal Block and WBlock could be a nested block if they utilize other blocks in their definition.
How to insert a Block in AutoCAD?
You can insert both Internal Blocks and WBlocks in AutoCAD. This is way simpler than creating a block.
Below are Steps to insert an Internal Block in AutoCAD:
Step 1: Type INSERT in the command line or select the Insert button in the ribbon area (Insert > Insert > Blocks from Libraries).
Step 2: Drag and drop the block in the drawing area. You can also right click on the block and select Insert.
Inserting a WBlock involves the same steps as Internal Blocks but first you will need to load the WBlock file in the block libraries. (Insert > Insert > Block from Libraries > File Navigation Dialog Box > Choose File).
You can choose to scale, rotate and explode the block when you insert it.
Dynamic Blocks: Adding Flexibility to Static Blocks
What are Dynamic Blocks in AutoCAD?
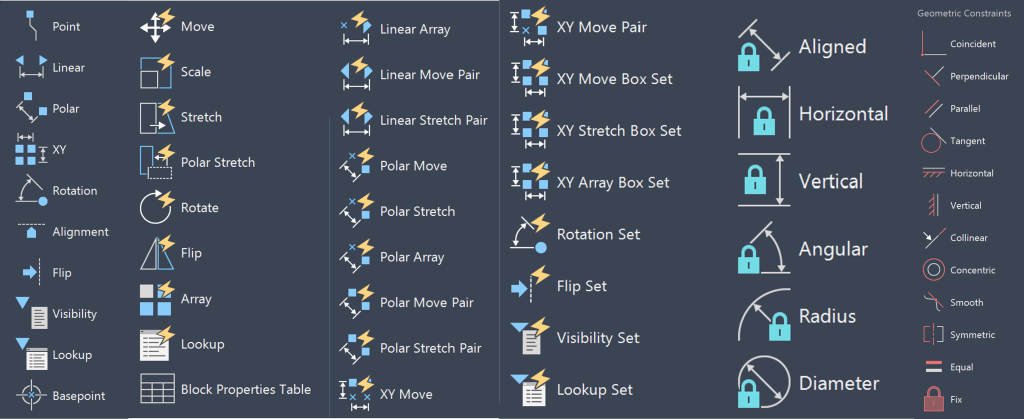
Dynamic blocks are created when actions and parameters are added to regular cad blocks. Parameters refer to the geometric properties that change and actions refer to what happens to those parameters. Some of the parameters include linear, rotation, flip, point and polar. Some of the actions include move, scale and stretch. Below is a picture of different tabs and options available in the Block Authoring Palettes.
How to Create Dynamic Blocks in AutoCAD?
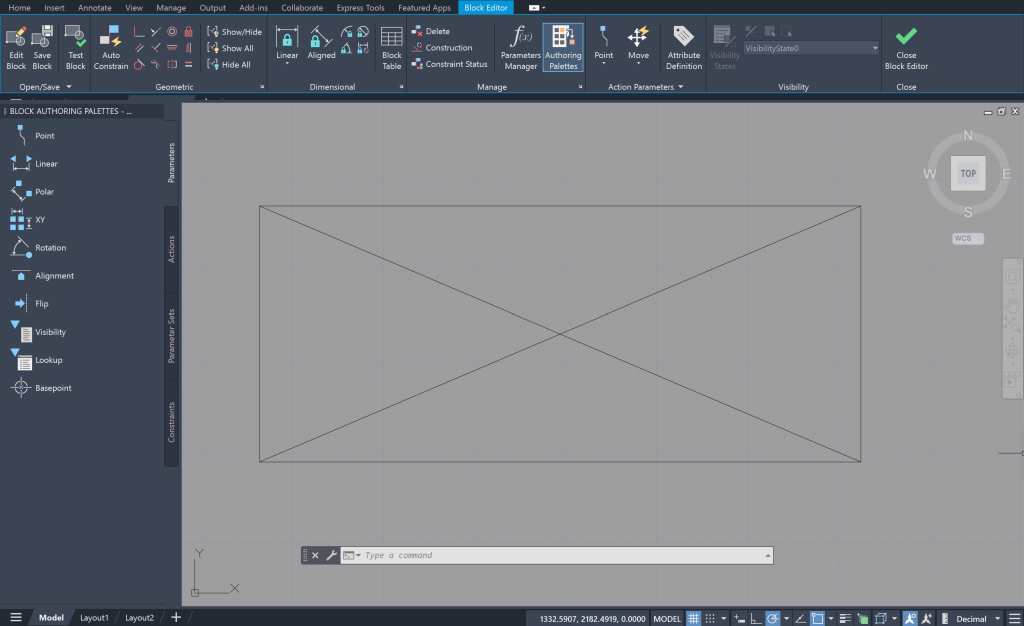
Open the block you want to convert into a dynamic block in the block editor environment. One way to do that is to insert the block into the drawing area and double-click it.
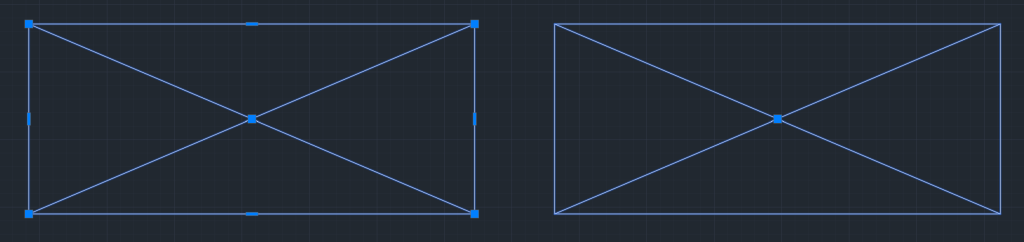
Once in the block editor, you can add Parameters, Actions, Parameter Sets, and Constraints. There are a lot of ways to make a block dynamic. Lets explore an example below where we create a dynamic triangle block. The steps involved are as follows:
Step 1: Create a Triangle Block and open it in Block editor.
Step 2: Once in the block editor, first add the linear parameter on the horizontal plane of the triangle.
Step 3: Next add the Stretch action on the horizontal plane of the triangle.
Step 4: Save and Close the block editor.
You will see that your triangle will now have a grip point which you can drag to increase the length of the triangle.
Dissecting the Block Editor
How to edit an existing block?
You can edit an existing block by double clicking on it. This will open the block editor where you can change the block and update it.
What are key features of Block Editor?
The block editor is helpful to update a block and also add dynamic functionalities to the block.
Count
What is the Count feature in AutoCAD?
The Count feature is an in-built AutoCAD feature that counts the instances of a selected block in a given window.
How to Count objects in AutoCAD?
Step 1: First activate the count command by typing COUNT in the command line.
Step 2: Select one of the options below based on your need:
- Current Area
- Entire Model Space
- Object
- Polygonal
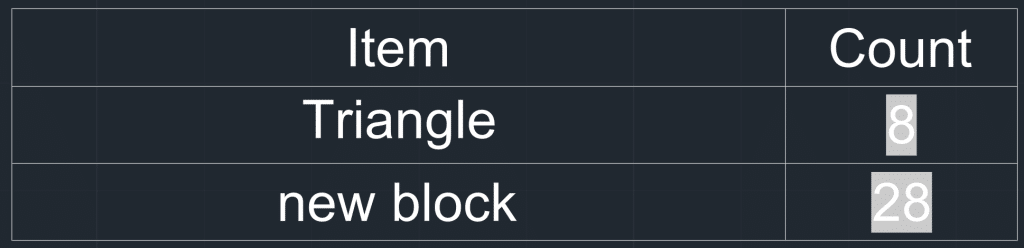
Step 3: Check out the Count Palette to see the quantities of each block selected.
What are the benefits of the Count feature in AutoCAD?
The count feature is pretty useful to keep track of the number of different blocks in a given AutoCAD file. You can use the COUNTTABLE command to generate a table with the quantities of all blocks in a given CAD drawing. This tool really helps you save time from manually counting each block in the drawing.
Integration of Blocks, Dynamic Blocks, and Count
When you need to use an object multiple times in a drawing, it’s best to convert it into a block. This allows you to insert multiple copies by adding the block to the block definition. This process not only saves time but also helps prevent errors in object accuracy. You can also add parameters and actions to a standard block to manipulate some of its properties. The count feature is helpful in keeping track of all the CAD blocks in a drawing.
Frequently Asked Questions (FAQ)
How to Rename Blocks in AutoCAD?
To rename blocks in AutoCAD, use the RENAME command. First, type “RENAME” in the command line and press Enter. Then, select the “Blocks” category in the Rename Palette. Choose the block you want to rename, and finally, enter the new name in the “Rename To” section.
Can I convert regular blocks to dynamic blocks?
You can convert a regular block into a dynamic block by adding parameters and actions to the regular block in the block editor. Simply double-click on the block and add the parameters and actions in the block editor environment.
Where are blocks saved in AutoCAD?
Internal blocks are saved in the CAD drawings they are created, and WBlocks are saved as separate CAD drawings.
How to Delete Blocks in AutoCAD?
You can delete unwanted blocks in AutoCAD by using the PURGE command.