AutoCAD Table Fundamentals: 5 Concepts to Boost Your Productivity
Tables in AutoCAD are a valuable tool for presenting data or information in a tabular format. Tables are often used in AutoCAD to create cost estimates, survey data, and specifications. In my professional journey as a Civil Design Engineer, I have used tables a lot to create Zoning Tables for concept plans and site plans.
The simplest method to create a table is by using the TABLE command to generate a dynamic object. Alternatively, you can link a table from Microsoft Excel or copy and paste one directly from Excel. Tables can be modified in various ways, and you can also customize their styles. Understanding the intricacies of tables will enhance your efficiency and help you appear more professional in your workplace or classroom. Let’s explore the five most important concepts to master when it comes to AutoCAD tables.
Creating a table in AutoCAD using TABLE command
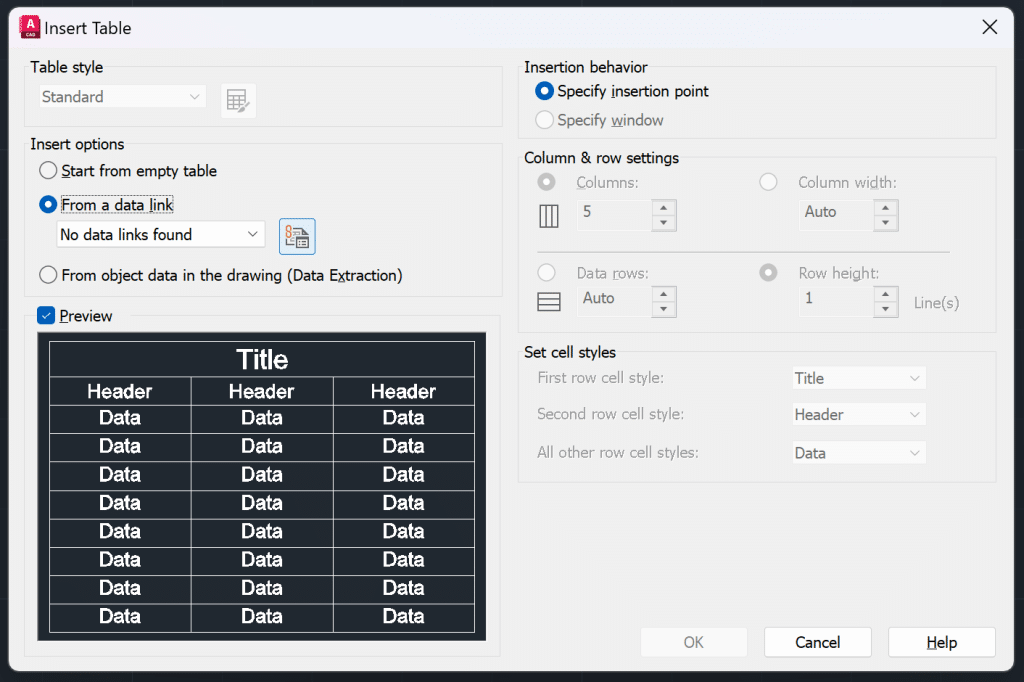
The most basic way to create a table in AutoCAD is by activating the TABLE command in the command line or selecting the Table option from the Ribbon (Annotate > Tables > Table). Once you activate it, the Insert Table dialog box will open up.
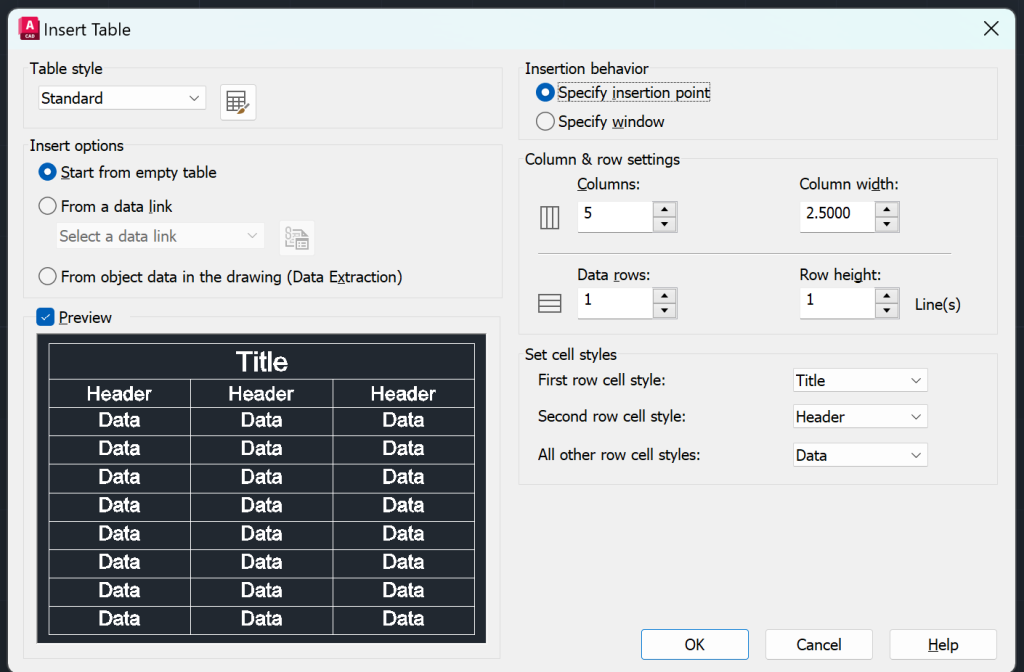
There are various options in the Insert Table dialog box. Lets explore each in detail below:
| Property | Features | Images |
|---|---|---|
| Table Styles | Choose the style for the table. |  |
| Insert Options | – Start from empty table – From a data link – From object data in the drawing (Data Extraction) | 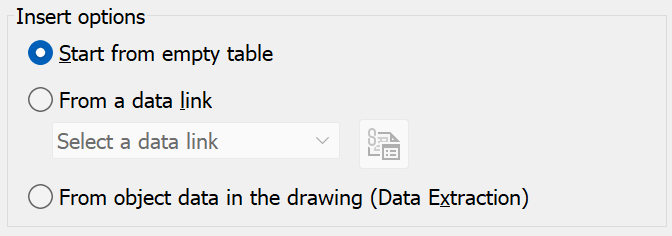 |
| Preview | The preview option allows you to view a draft of the proposed table. | 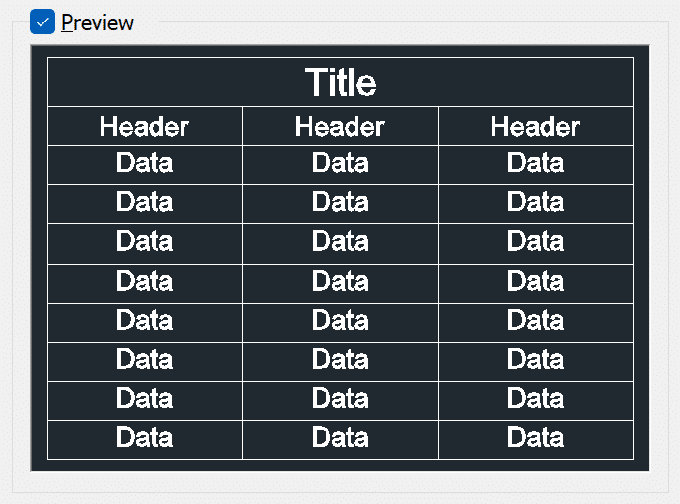 |
| Insertion Behavior | Specify Insertion Point: This option allows you to specify a point in model space where you want to insert the table. You enter the cell width and number of rows in the Insert Table dialog box. Specify Window: This option allows you to specify a point in model space. The cell width and number of rows are determined by dragging the mouse in the right direction (to increase the cell width) and the down direction (to increase the number of rows). |  |
| Column & Row Settings | This option allows you to add the number of columns, column width, data rows, and row height. | 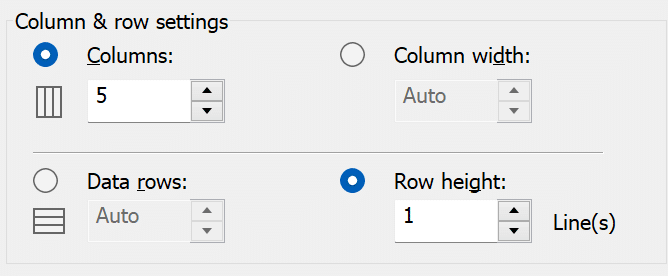 |
| Set Cell Style | This option lets you choose the components for your table – Title, Header or Data row. | 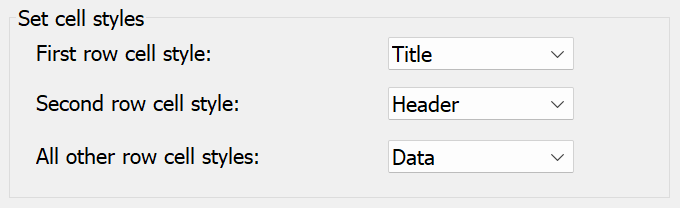 |
Below is a GIF that shows how to create a Sample Table in AutoCAD.
Create Table Styles in AutoCAD
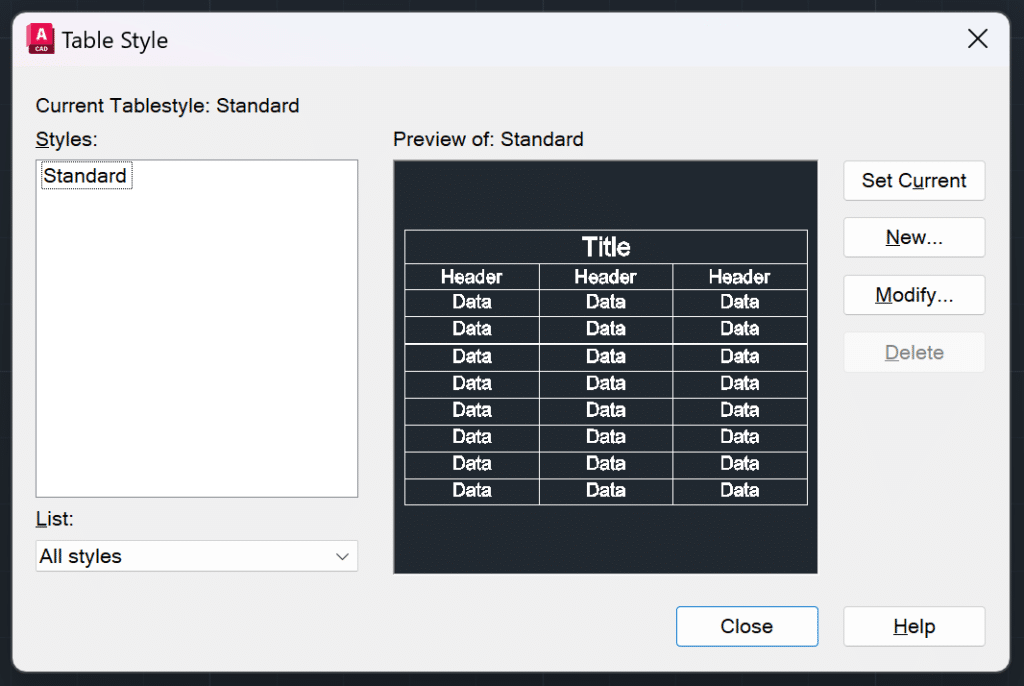
The table styles in AutoCAD are predefined formatting templates that determines the appearance of the table. You can choose or create table styles by typing TABLESTYLE in the command line. The Table Style dialog box appears. You can choose one of the predefined styles or click on NEW to create a new table style.
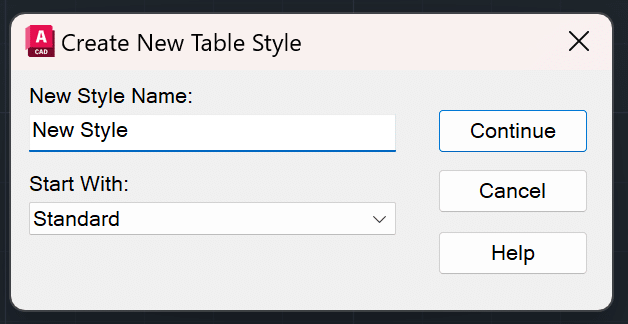
When you click on the NEW button, the Create New Table Style dialog box will open. First, you will need to choose a name for your new style and select a starting style. By default, the STANDARD style is selected. Click CONTINUE and you will be presented with various parameters to help you create the ideal Table Style for your needs. Let’s explore the New Style Dialog Box and various parameters in the New Table Style below:
| Property | Features | Images |
|---|---|---|
| Starting Table | This option lets you choose formatting options from an existing Table. |  |
| Table Direction | You can either have your table Down or Up. In the Down option, the Table starts with Title, then Header and then Data. In the Up option, Table starts with the Data, then Header, and then the Title. | 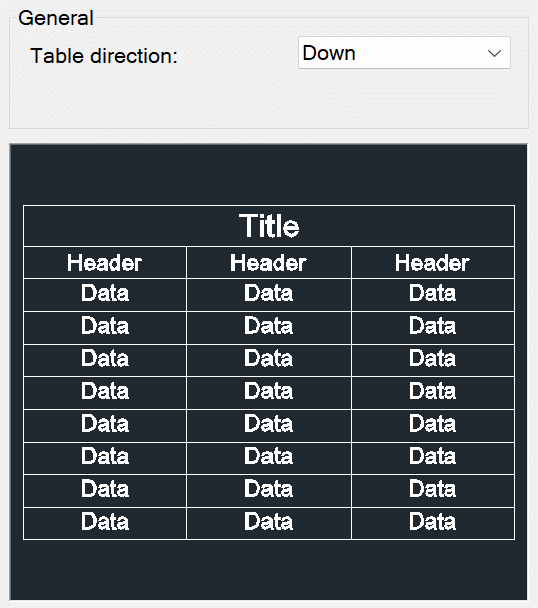 |
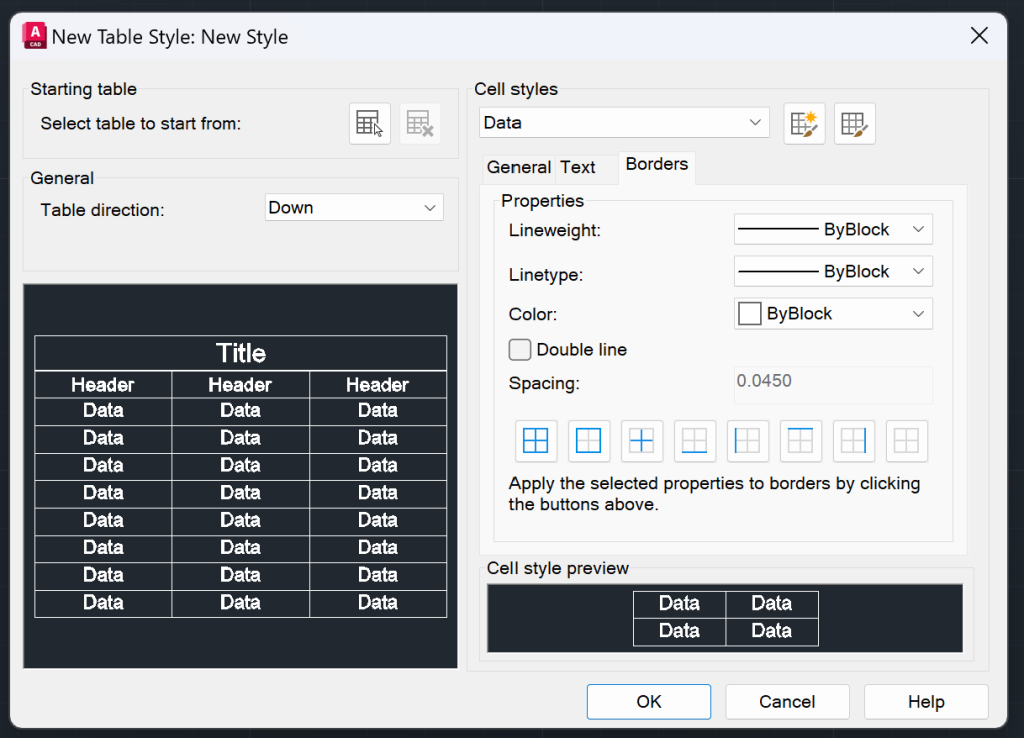
| Cell Styles | In the Cell Styles you can update the style for your Data, Header, and Title. |  |
| General | – Fill Color (None or Select Colors) – Alignment (Top Left, Top Center, Top Right, Middle Left, Middle Center, Middle Right, Bottom Left, Bottom Center, Bottom Right) – Format (Angle, Currency, Date, Decimal Number, General, Percentage, Point, Text, Whole Number) – Type (Data/Label) – Margin (Horizontal and Vertical) – Option to Merge cells on row/column creation | 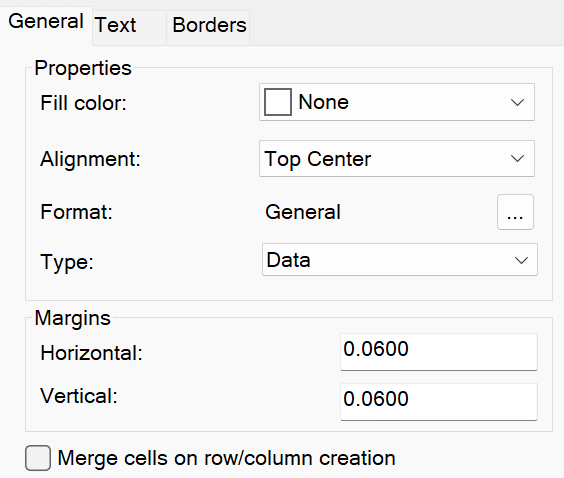 |
| Text | – Text Style – Text Height – Text Color – Text Angle | 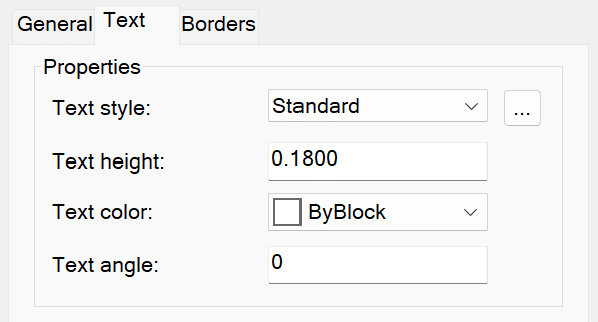 |
| Borders | – Line Weight (By Layer/By Block/Line Weight) – Line Type (By Layer/By Block/ Line Type) – Color (By Layer/By Block/Color) – Double Line (Yes or No) – Border Options | 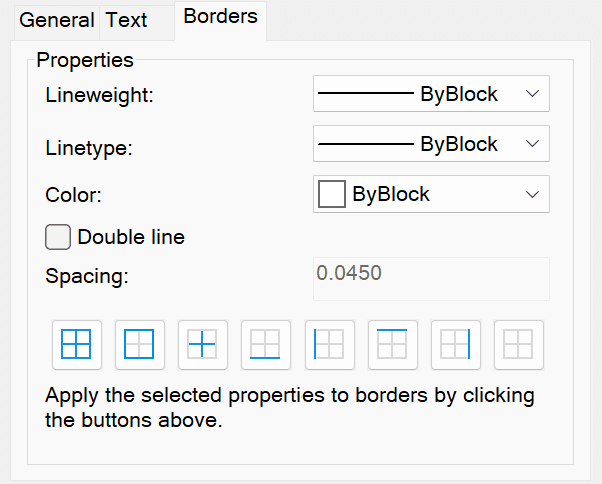 |
| Cell Style Preview | The preview option allows you to view how your proposed cells would look. |  |
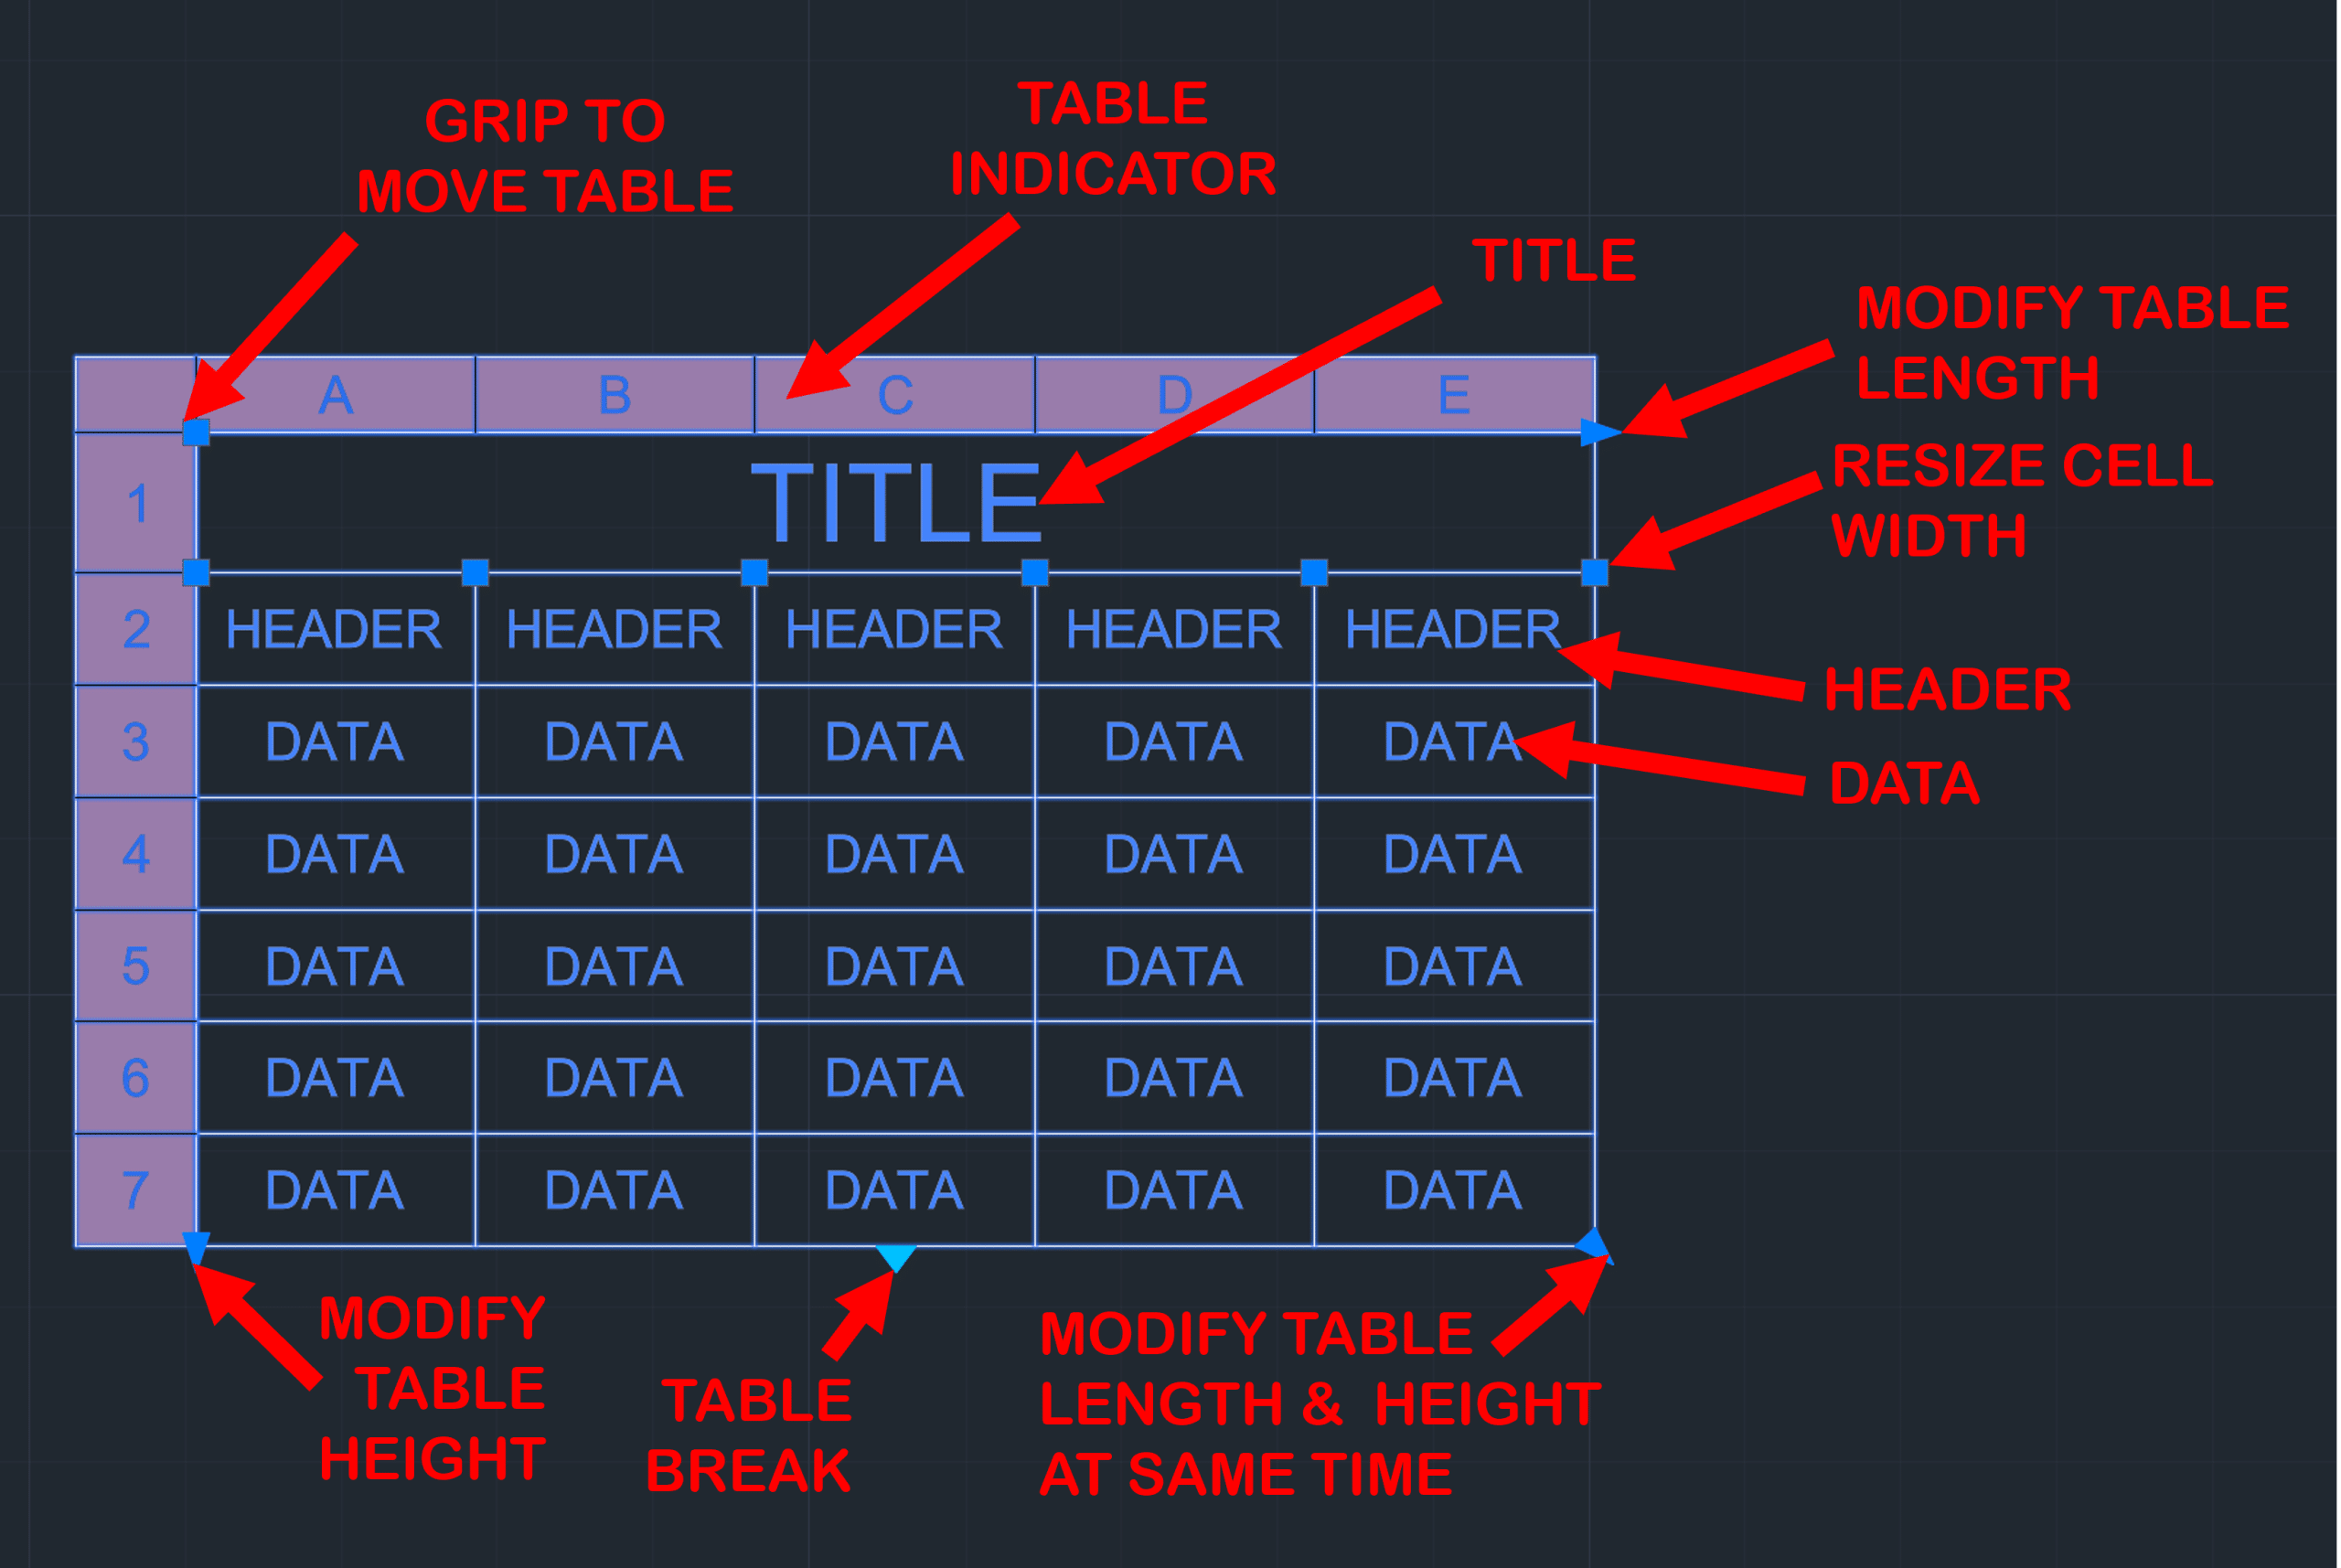
Table Components
There are various components to AutoCAD tables. You can learn about each component in the table below:
| PROPERTY | FEATURES |
|---|---|
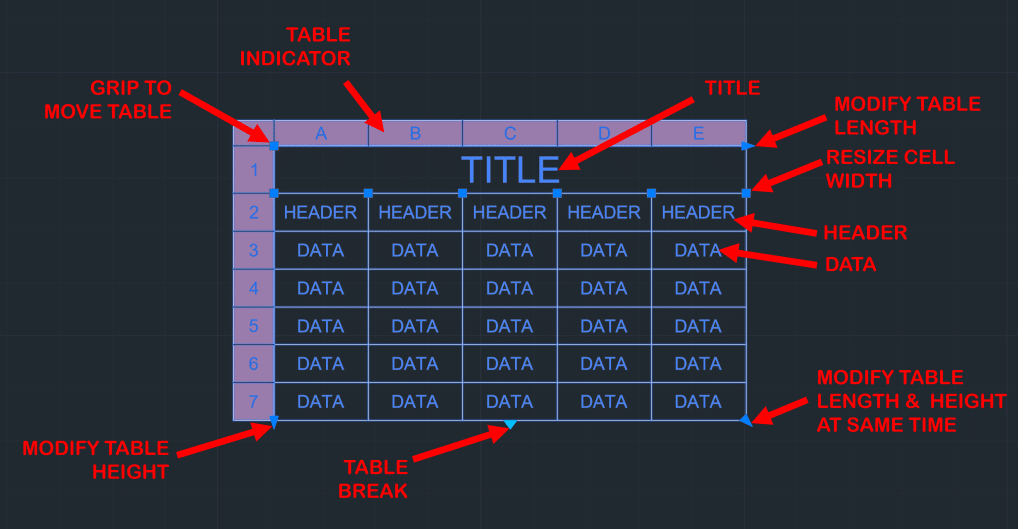
| Title | The cell that contains the Title of the Table. This is optional. |
| Header | The cells that contain the Header Title for a given row. This is optional. |
| Data | The cells that contain Data. |
| Grip to Move a Table | Select this grip to move the table. |
| Resize Cell Size | Drag this grip right or left to resize the cell size |
| Modify Table Length | Use this grip to uniformly increase the length of the table. |
| Modify Table Height | Use this grip to uniformly increase the height of the table. |
| Modify Table Length and Height at Same Time | Use this grip to uniformly increase the length and height of the table at the same time |
| Table Breaks | Used to split table in multiple sections |
| Table Indicator | Used to show column and row numbers/alphabet. |
Below is a GIF that shows how you can adjust various table components in AutoCAD.
Editing and Modifying Tables
You can modify AutoCAD Tables in many ways. Below are different ways you can modify AutoCAD tables and also how you can modify them.
| Modification | How to Modify? | Images |
| Adding Data to AutoCAD Table | Double click any cell of the table and then you can add data in the AutoCAD table. |  |
| Adding/Removing Row | First select a cell in AutoCAD table. In the Ribbon you will see 3 different options in the Row section: – Insert Above – Insert Below – Delete Row(s) | 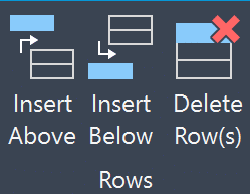 |
| Adding/Removing Column | First select a cell in AutoCAD table. In the Ribbon you will see 3 different options in the Column section: – Insert Left – Insert Right – Delete Columns) | 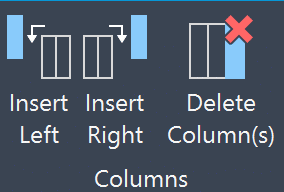 |
| Merge and Unmerge Cells | To merge cells, first select all the cells that you want to merge. In the merge section, you will see three different options to merge cells. – Merge All – Merge By Row – Merge By Column To unmerge the merged cells, simply click on the Unmerge button in the merge section. | 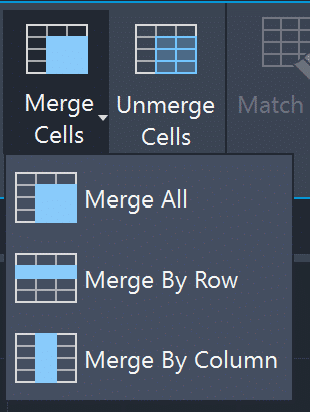 |
| Update Cell Styles | There are various options pertaining to Cell Styles: – Match Cell – Text Justification – Table Cell Styles – Table Cell – Background Color – Cell Borders |  |
| Cell Locking | There are four options pertaining to cell locking in AutoCAD: – Unlocked – Content Locked – Format Locked – Content and Format Locked |  |
| Data Format in Table Cells | There are various formats that you can assign to your cells: – Angle – Currency – Date – Decimal Number – General – Percentage – Point – Text – Whole Number – Customize Table Cell Format | 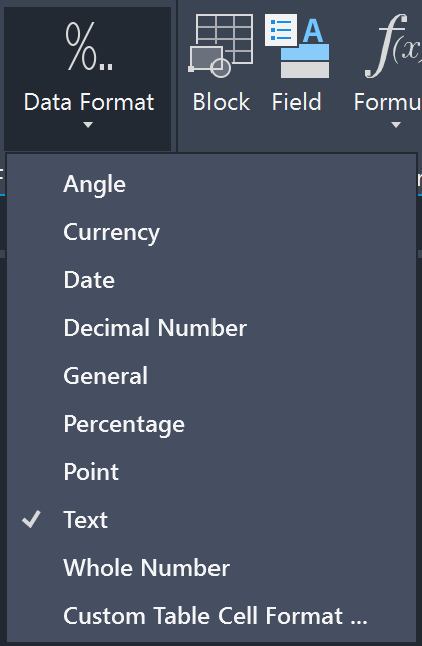 |
| Insert Blocks in AutoCAD Table | Insert an existing block in AutoCAD Table/Cell. To learn more about blocks, checkout my blog AutoCAD Block, Dynamic Block and Count for Efficient Design Creation. |  |
| Adding Fields to AutoCAD Table | Insert a Field or Smart Text in AutoCAD Table/Cell. |  |
| Adding Formula to AutoCAD Table | Similar to Microsoft Excel, you can add formulas to AutoCAD Table. Below are formulas that you can add: – Sum – Average – Count – Cell – Equation | 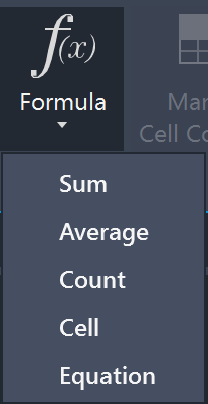 |
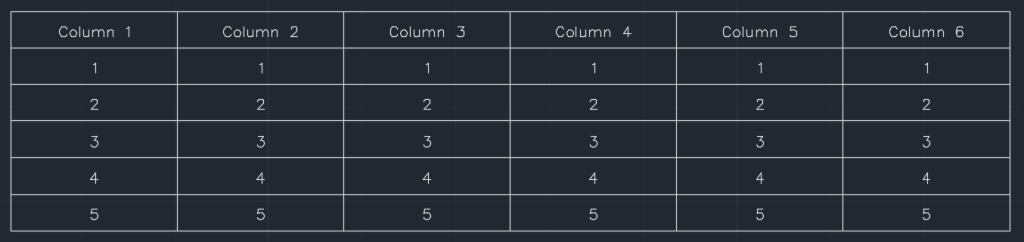
| Link Cell | With this option you can link AutoCAD Table Cells with data in a Microsoft Excel file. |  |
AutoCAD Tables and Excel
AutoCAD tables can feel annoying because you must double-click each cell to add or modify content. That’s when Excel tables become useful. You can create a table in Excel and either link or simply copy/paste it in AutoCAD. Let’s check it out in more detail below:
Data Link Table from Excel to AutoCAD
You can data link Excel table into AutoCAD. Simply follow the steps below:
- Activate the TABLE command
- Under Insert options, choose the FROM A DATA LINK option. Click on the down arrow to either select the Data Link or Launch Data Link Manager.
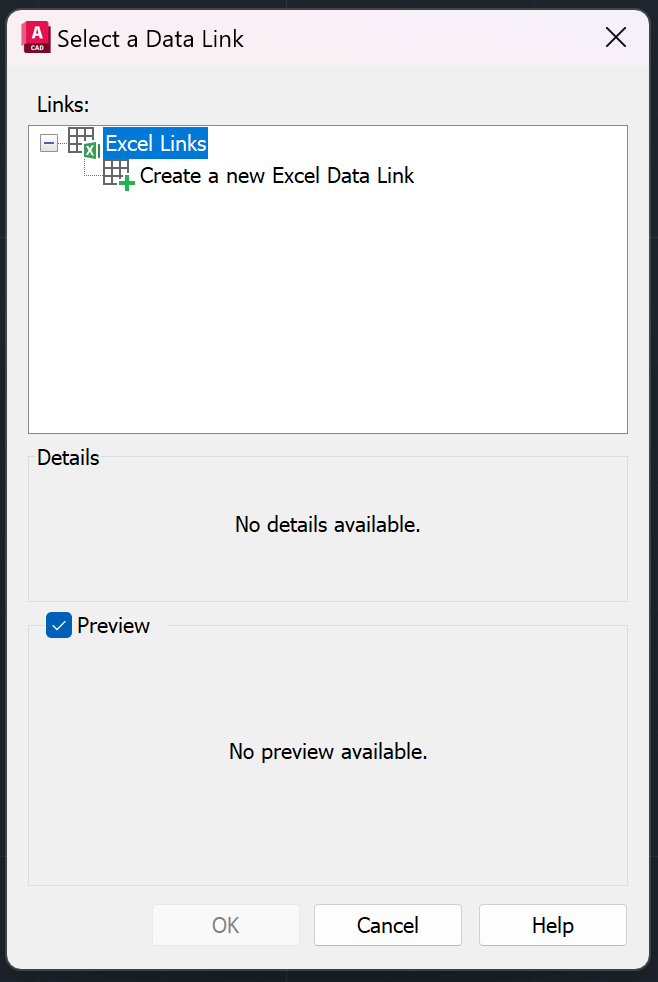
- In the Select a Data Link table, click on the Create a new Excel Data Link option.
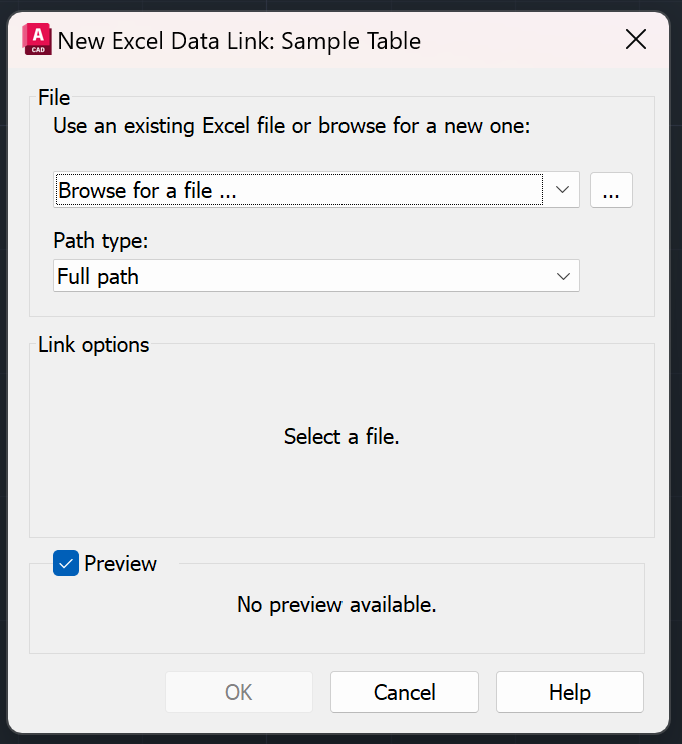
- The Enter Data Link Name Dialog box will appear, where you can add name of this data link.
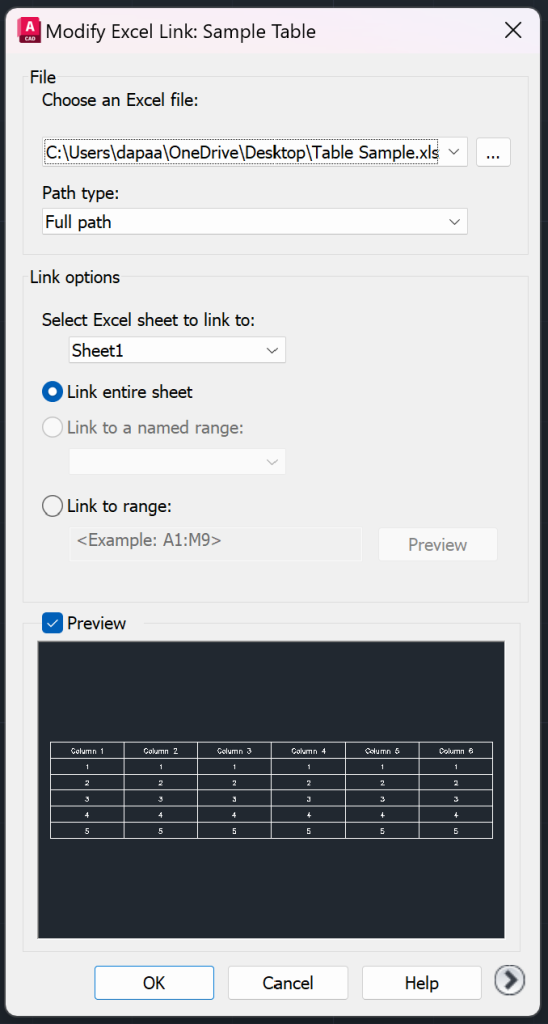
- Next, you will need to provide a path to the Excel Table Sheet. Once you provide the path, you will have the option to choose sheet, link entire sheet, link named range, and/or link to range. You can see the preview to ensure you are getting what you need.
- Press ok, 3 times, and then you can insert your data link table in the model space.

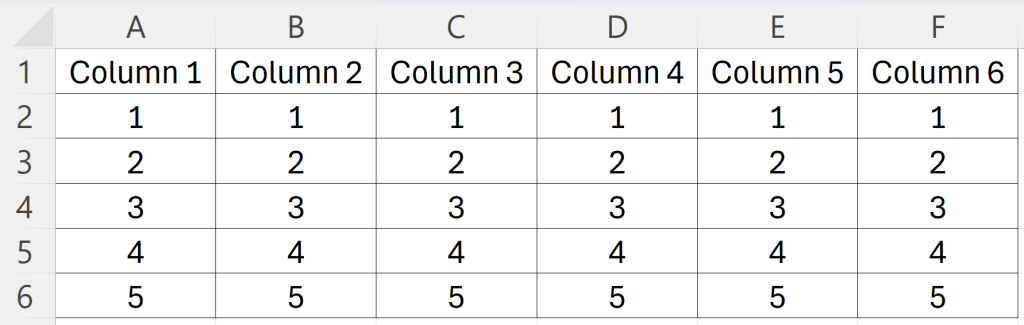
Copy & Paste Table from Excel to AutoCAD
This is the most straightforward method to import a table from Excel into AutoCAD. Simply copy the table from Excel and paste it into AutoCAD.
If you use the Paste Special option and select Microsoft Excel, any updates made in Excel will be reflected in AutoCAD.
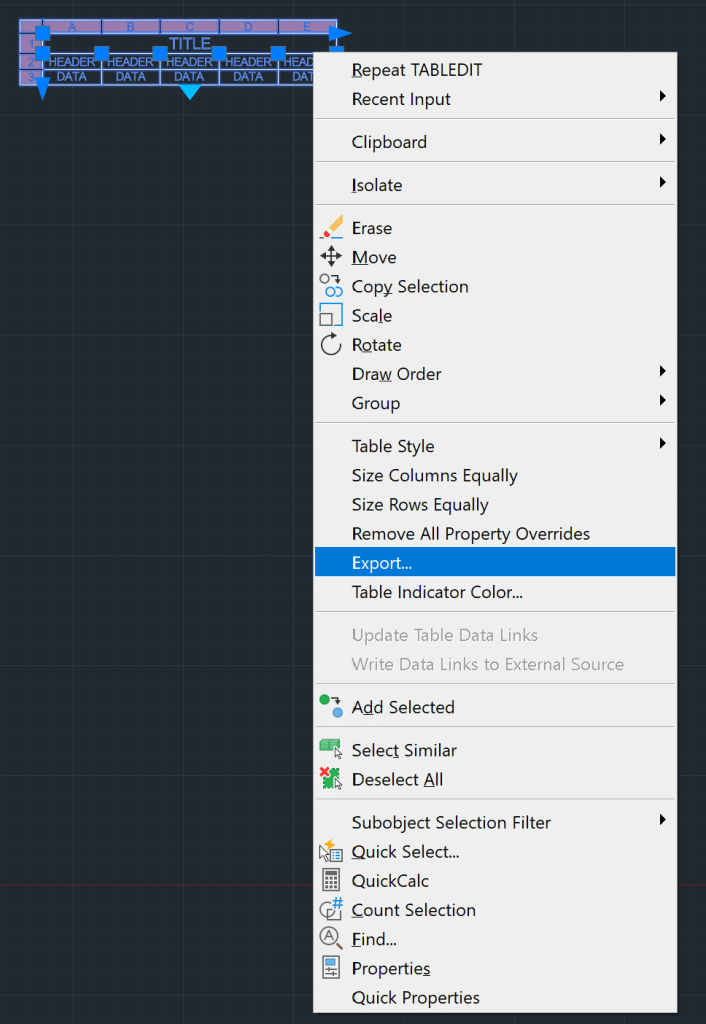
Export Table from AutoCAD as a.csv file
To export an AutoCAD table as a .csv file, follow the steps below:
- Right-click on the table you wish to export and select the EXPORT option.
- Then, choose the location on your computer where you want to save the .csv file containing the table.
- Your AutoCAD Table is successfully saved as a .csv file.
Hope you enjoyed learning about AutoCAD Dimensions. To learn more about other aspects of AutoCAD, feel free to checkout 25 Foundational Concepts of AutoCAD.